Setting up macOS Catalina: New machine setup for general use
A quick checklist for configuring a macOS Catalina (macOS 10.15) computer for general (personal or professional) use for the first time.
NB: As mentioned in the previous guide, Setting Up macOS Catalina: Wipe and Reinstall, before you install Catalina you should check if you need any 32-bit apps if you are upgrading from Mojave.
Maybe you're setting up a brand-new machine. Maybe you're setting up a machine that was previously used for one person for use by another person. Either way, this is a checklist for common setup, configuration, and customization options for macOS.
OSX Installation Initial Configuration
Welcome Screen
- Select your country, e.g. United States, and hit continue.
- Log in to the wi-fi that's available to you, or connect over ethernet if that option appeals to you.
- Select Don't transfer any information now. For a longer discussion of why it's better to not transfer your information when setting up a new computer, check out Setting up macOS Catalina: Organization and Productivity. (coming soon)
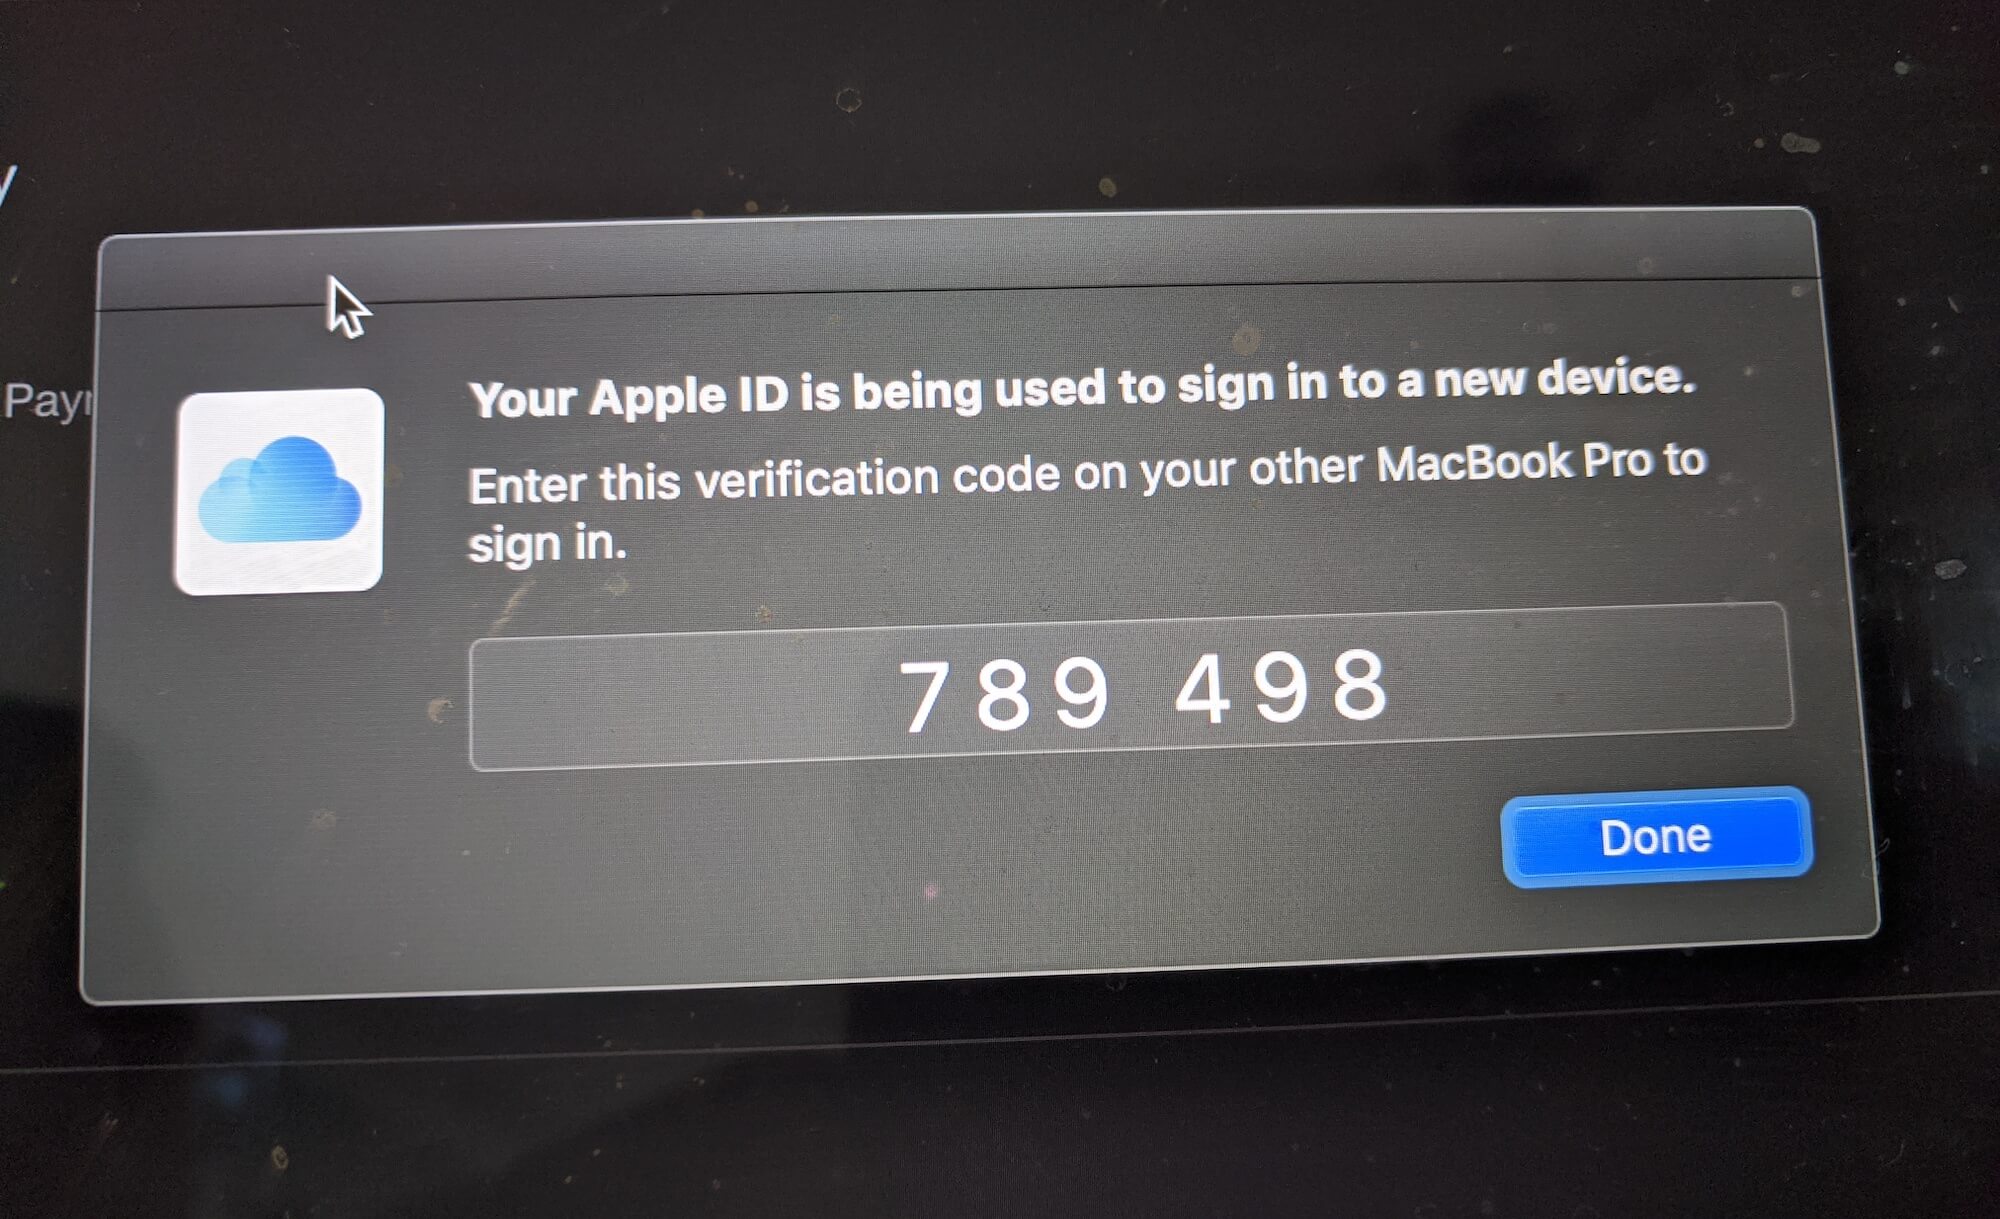
Apple ID (you can do this later)
Apple ID is the lock for iCloud and synced services. It's worth having a unique, hard-to-crack password for Apple. In other words, don't use the same password you use to sign up for random sites on the internet here. Maybe you want to use an all-purpose password for initially setting things up. If you do, make a plan to change your Apple ID password to a secure one once you have a free minute. Read more about password considerations in the Setting up macOS Catalina: Organization and Productivity. (coming soon)
When signing into an Apple ID on a new device for the first time, Apple asks me to confirm that device on one of my other Apple products. If you have other Apple products, but they aren't close at hand, I'm not sure how this would work. If you do have another Apple device that you're logged on to nearby, enter the code that appears on the second Apple device to authenticate the new device.
Agree to the Terms and Conditions.
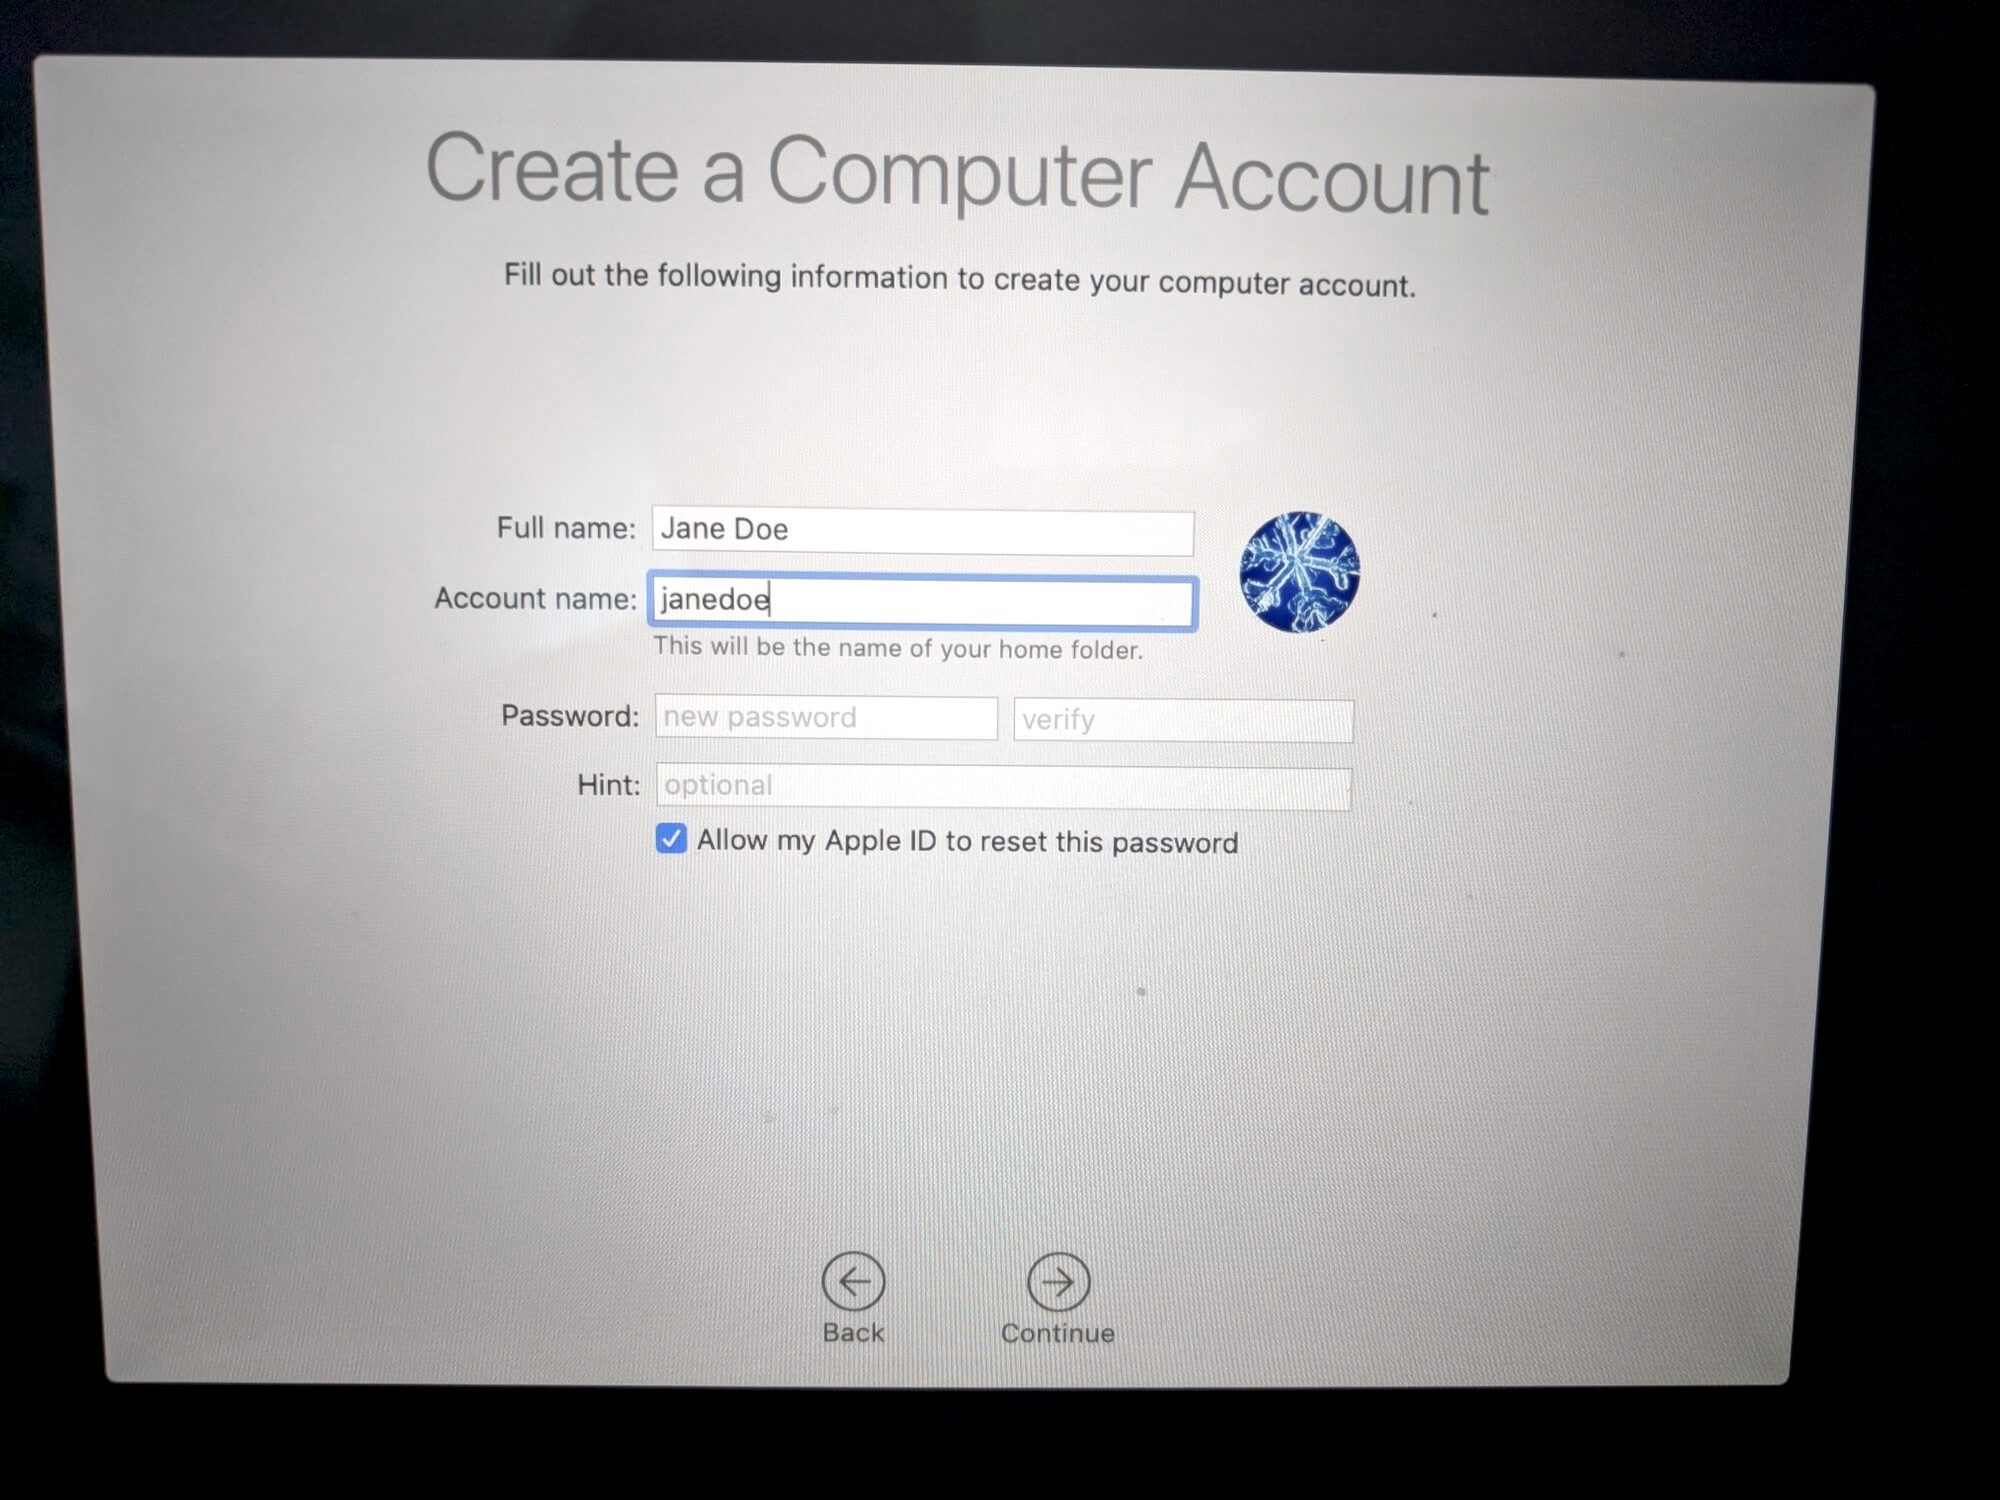
Create a Computer Account
If this is a personal computer, first name only should work well for the computer account name. Especially for development, keeping the name of the computer account short can save some milliseconds typing, which adds up over time. For a professional machine, first and last name is a safe option for the computer account name. If you work in a company with an intranet, they might have some requirement on what your account name should be.
iCloud Keychain
I'd recommend using a password manager like Dashlane, 1password, or LastPass rather than iCloud Keychain, but to each their own. If you don't want to use iCloud Keychain, select Set up later.

Customize Settings
Don't do the Express Set Up and instead select Customize Settings.
Enable Location Services
Since I want to have Find My Mac enabled, I enable Location Services.
Do not Share Mac Analytics
See more discussion in the Setting up macOS Catalina: Privacy and Digital Hygiene guide (coming soon).
Ask Siri
I do not enable Ask Siri, personally.
Store files from Documents and Desktop in iCloud drive
I try to use iCloud drive as little as possible. Deselect this option as well as iCloud photos.
FileVault Disk Encryption
IMHO, the only reason why you'd not want to encrypt your hard drive is if you think you might lose both your computer password and your Apple ID. You shouldn't lose both of these. If you think you might, then don't encrypt your hard drive. Otherwise, why not? Most people won't need to worry about someone getting into their computer without their password. However, if encrypted hard drives were the norm rather than the exception, I think all of our data collectively would be safer.
Touch ID
Biometrics are widely considered a less secure option for securing devices than pins and passwords. You should probably just use your password and not the fingerprint reader. But you can make the choice whether the convenience is enough that you want this. Just don't make the mistake of thinking it's any more secure, because it's generally considered less secure. Macbook fingerprint readers are better than some other ones I've tried.
The truth is, fingerprints and other biometric authentication methods are flawed. You shouldn't rely on them if you actually care about mobile security. PINs and passwords are much more secure - if less convenient - methods of authentication.
- Friendly reminder: Biometrics are not the best way to secure your phone
Choose Your Look
I always choose Dark theme because I'm hip. If you're not hip, choose the light theme, I guess.
Customize your Computer
I'm in
Now we can see the desktop… You did it, congratulations!

Allow location access for Calendar.
Install Apple updates.
Xcode download (optional)
Xcode is an application only needed if you plan to do development on your Mac. At almost 12GBs, it's good to start downloading Xcode first if you're going to need it. If you don't plan to use the computer for development, you can skip this.
Full Xcode installation instructions are in the Setting up macOS Catalina: New machine setup for development guide (coming soon). If are setting up your Mac for development, you can follow along with that guide as well.
Browser(s)
Macs come installed with Safari. While it's fine to use Desktop Safari, in general it will lead to some of the buggiest web browsing experience on the web in 2020. The first browser I would recommend getting is Mozilla Firefox and the second is Chrome.
TL; DR
Get Mozilla Firefox for primary browsing purposes and have Chrome on hand for when a website doesn't work in Firefox.
Mozilla Firefox
Firefox - Protect your life online with privacy-first products
Mozilla Foundation is a non-profit and deserves a lot of credit for popularizing good security practices on the web. Their leadership is really crucial. This is especially true when compared to some other companies who do not emphasize protecting their users' private information. So because I support Mozilla as an organization, I like to use their browser as my primary web browser.
Unfortunately, not all companies making websites test their websites in Firefox. I've experienced errors in Firefox that I don't experience in Chrome. Sometimes, those errors completely prevent me from using the website as intended (e.g. can't check out). So, while I default to Firefox as my primary browser, I keep Chrome around. I don't view that as a problem with Firefox as much as it's a problem that some companies don't adequately test their websites in different browsers.
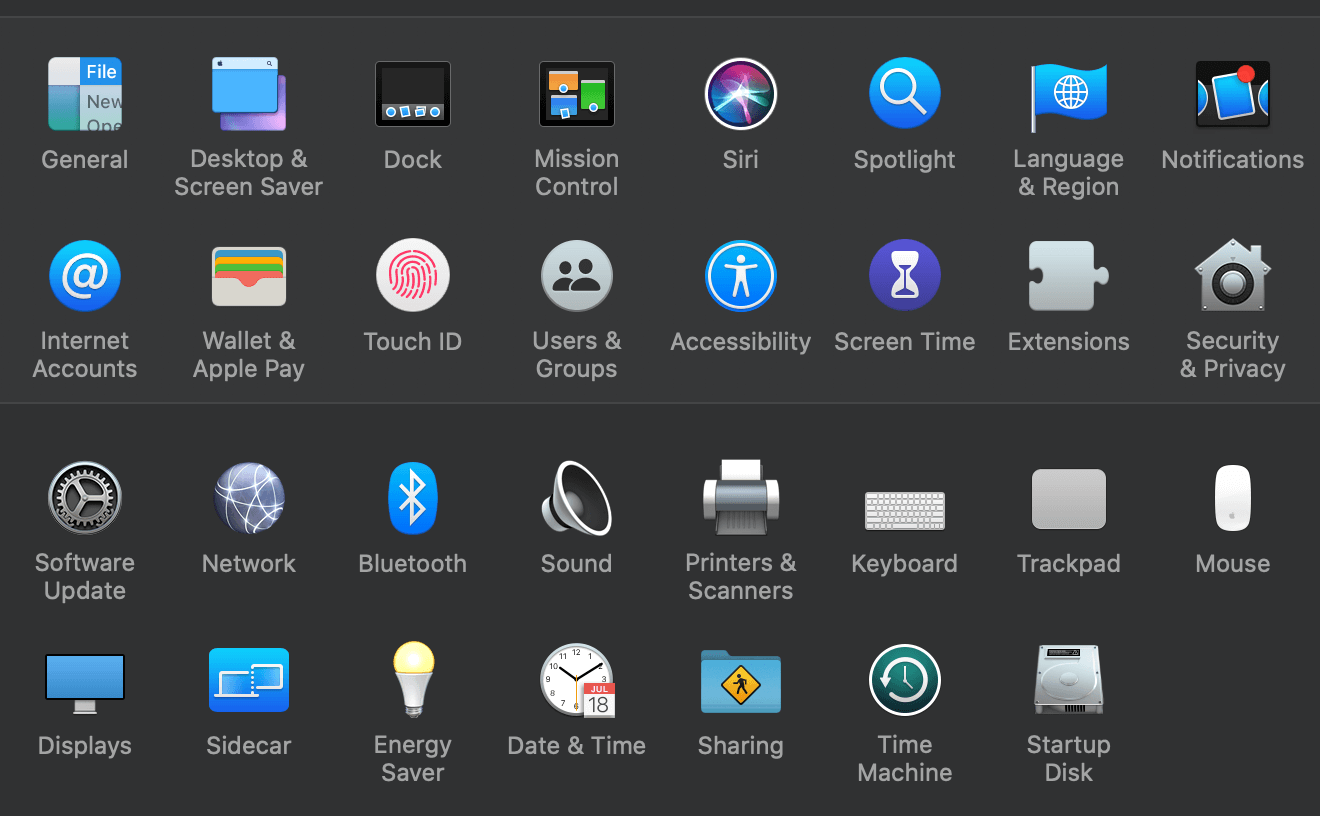
System Preferences
Let's go through some options you might want to change in System Preferences.
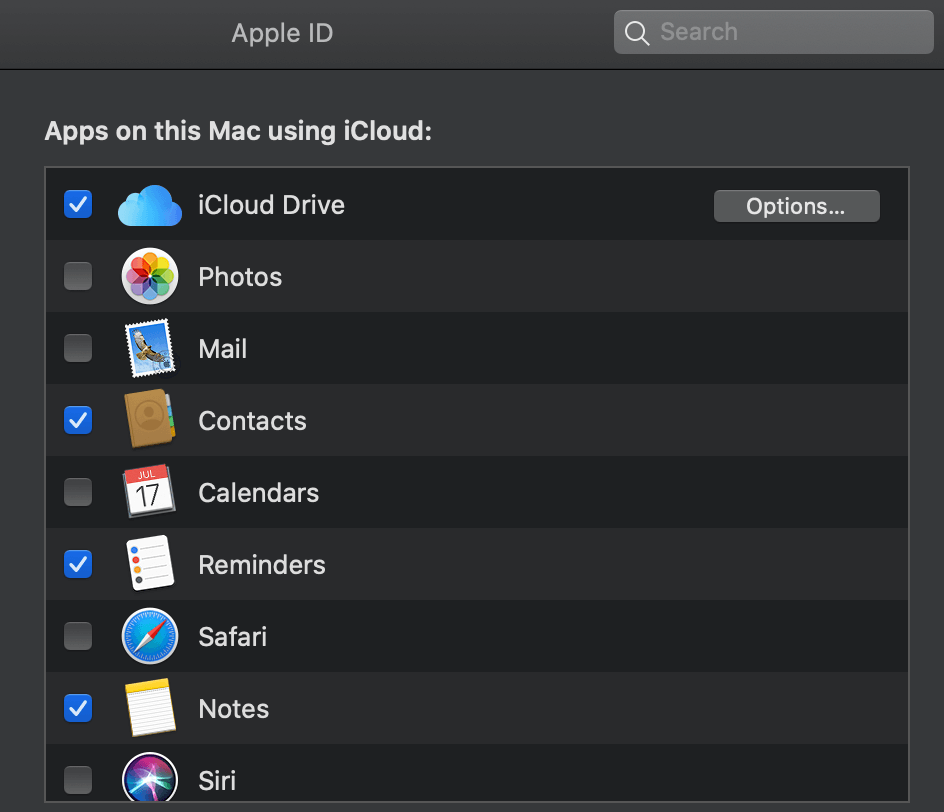
Apple ID
On Mojave, this section of System Preferences used to just be called iCloud. Now it's got a new name - Apple ID - and it's where we can select or deselect what types of our information is stored remotely in the "cloud" versus on our local machine. For Apps on this Mac using iCloud, here's what I would deselect as defaults if privacy is a concern for you:
Allow
- iCloud Drive
- Contacts
- Reminders
- Notes
- Find my Mac
- Home
Deselect
- Photos
- Calendars
- Safari
- Siri
- News
- Stocks
Either way this is a matter of personal preference and what you use and do not use. Be careful with how much you put on iCloud though, as it can represent one of the biggest data vulnerabilities of modern life.
General Settings
One thing to change here is the default web browser. Use this screen to change the default web browser and read over the other options in case something else appeals to you to change.
Change Scroll Direction
Scroll direction is changed on the Mouse or Trackpad page of the System Preferences, depending on which you're using. I like to use the "unnatural" scrolling direction. Since the default is "Natural," I always need to deselect this option. Most people will probably prefer the Natural scroll style.
Change CNTL-click to be right click on trackpad
To enable right-clicking in Mac go to System Preferences -> Trackpad and change "Secondary Click" to be "Click in bottom right corner." I think this configuration change would likely be one that appeals to people more used to using Windows. Personally, I prefer to be able to access the context menu (aka right-click menu) with one click by one hand, rather than holding a button with my left hand and clicking with my right, or double tapping the trackpad. While you're here, check out the rest of the options to see if there's anything else you'd like to change.
Change Computer Name (optional)
Go to System Preferences -> Sharing (it's the third to last icon). You can change the natural language name as well as the computer version of the name from here. The default is "Firstnames-Macbook-Pro," which I'm not a fan of. When developing on a Mac, you will often see the name of the computer. In this case, I'm naming the computer the name of the organization I work for, so it will show up "Firstname@organization" in the console.
Energy Saver
Finally, I like to have my displays turn off a little longer than the defaults after inactivity. For Battery I like about five-ten minutes and for Power adapter I like 15 minutes.
Battery Percentage
In the top bar, you can turn on the battery percentage display by clicking the battery and then clicking "Show Percentage."
Remove extra Dock taskbar items
On macOS, the Dock, or taskbar, is the collection of active and pinned app icons that is along one side of the screen, the bottom side by default. After a fresh installation of macOS, there is a large number of apps pinned here. Most users will only use a tiny amount of them. In general, if you're not sure what you want, remove any that you're unsure about. Later, if you start using that app regularly, you can always pin it back.
Mac provides a lot of taskbar items by default, and you should probably get rid of most of this. I like to do this early to clear the visual clutter from my screen. Here's what I left and removed, it should probably be slightly different for everyone. A good rule of thumb could be, would you use this app at least once a week? If not, you could probably remove it from your bar. To remove an item from the dock, hold Cntl and click to access the context menu. Select Options -> Remove from Dock. For a deeper discussion of what's good to leave and remove from the taskbar, see the (upcoming) Setting up macOS Catalina: Organization guide (coming soon).

Dock icons left
- Finder
- Notes
- Firefox
- Chrome
- Mail (remove if you plan to use a different email app)
- Calendar (remove if you don't plan to use a different Calendar app)
Dock icons removed
- Launchpad (read the Productivity guide for how to assign a keyboard shortcut to for Launchpad or other useful apps).
- Safari
- Facetime
- Maps
- Messages
- Photos
- Contacts
- Reminders
- Music
- Podcasts
- TV
- News
- App Store
If you don't think you'll use the app more than once a week, just access it from the Applications list in Finder, rather than keeping it on your dock. As you install different applications you regularly use (e.g. Slack, Discord, or development applications), right-click or cntl-click in the Dock and select Options -> Keep in Dock so that they won't disappear when you close the app.
Touch Bar
Not a believer
I'm just going to go ahead and say it: I'm not a fan of the touchbar. From removing ports, to the "Butterfly Keyboard," to the touch bar, to the big touch pad, all the features and changes Apple has made to the Macbook since 2015 feel at best unnecessary and at worst a step backward. The keyboard on the 2012 Macbook Pro I'm writing this one is substantial, tactile, and never had a repeated key issue. While my HDMI port no longer works (it is an eight-year-old laptop, it's seen a lot), it did come with an HDMI port. No dongle needed. The touchpad is a decent size and I never accidentally rest my thumb on it like I do with the newer touchpads. My volume buttons do not move, and I can find the volume-down button without looking.
These are simple and small issues, but when you need to spend a lot of time on a computer, these small issues can add up. I just don't want buttons that I can't feel that constantly shift position. However, I fear we may be stuck with the touch bar, maybe for all Macbook releases going forward. So in the spirit of making it work, here's how to set your touch bar to have a set of buttons that stay the same even when you change apps.
Set the touchbar to stay the same
Navigate to System Preferences -> Keyboard and select Customize Control Strip. How you customize your control strip is up to you, but the Default Set is a very good option. My variation on the Default Set is as follows:
Screen Brightness
Show Desktop
Music Controls
Sound Controls
Since this is less options then the Default Set, I added spacers between the sections, giving ample extra room and making them easier to find.
Now that you've set what you like your touchbar options to be, hit Done and return to the Keyboard page of System Preferences. Now, where it says "Touch Bar shows" select "Expanded Control Strip." You can leave "Press Fn key to" as "Show F1, F2, etc. Keys," since you will still want access to those.
Life your best Catalina life
There, now you've done it. You can consider your Mac customized, configured, and set up. While there are other ways you can continue to customize your Mac, such as using keyboard shortcuts, this list should get you most of the way there. There are more articles in this series forthcoming on how to optimize your Mac for productivity, optimal organization, and good digital hygiene. In addition, an article on how to set up your Mac to do web development is also in the works. Check back here for links when those are finished in the next few weeks. Thanks for reading.